3rd Grade Earth's Changes Unit —Helpful Teacher Tips
Helpful Teacher Tips
Lesson 1
 A PowerPoint slide show containing colored photographs of tombstones is available on the electronic blueprint. This can be used to supplement the pictures in the Student Guides.
 A PowerPoint slide containing abbreviated lab directions is available on the electronic blueprint. The slides can be displayed on classroom TV monitors.
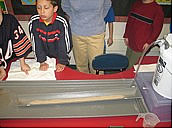
Student Drawings of Sugar Cubes
Following this set of drawings, the teacher will most likely need to help students identify important parts/features of a quality drawing.
- Title
- Labels of various parts of the drawing
- Include details
- Sized appropriately so all the parts can be clearly viewed
- Organized—in this case the drawings should not be randomly placed all over the paper.
![]() Supplementary Resource: Cracking Up: A Story About Erosion by Jacqui Bailey is a wonderful book to read to the class as a launch to the unit. The book is available through the library.
Supplementary Resource: Cracking Up: A Story About Erosion by Jacqui Bailey is a wonderful book to read to the class as a launch to the unit. The book is available through the library.
Lesson 2
Experiment Supplies (See Before You Begin on page 59 in Teacher's Guide):
- Make sure to collect shoeboxes with detachable lids prior to starting the unit. Approximately 8 are required.
- Play sand has been added to the kits.
Safety & Goggles: Students must wear goggles during the Sand Blasters experiment. Goggles have been added to the kit. At the end of the unit, the goggles, along with the kit, will be collected. At that time, the goggles will be sterilized.
Running the Experiment: Per the directions in the Student Guide (see page 32), students are to blow through the straw for one minute. Thirty seconds is sufficient for attaining the desired results.
PowerPoint slides containing abbreviated lab directions are available on the electronic blueprint. The slides can be displayed on classroom TV monitors.
For teachers' reference, pictures of the three index cards from the Sand Blasters experiment are available on the electronic blueprint.
Student Observations/Drawings: During the first set of experiments, the students blow the pile of sand gently and harder. Bullet #6 on page 32 in the Student Guide instructs students to draw pictures. Making accurate pictures is one of the unit benchmarks. To make this experience the most meaningful, student should draw the sand three times: (1) prior to blowing gently, (2) after blowing gently, and (3) after blowing harder. A top-down or bird's eye view works best when drawing the boxes with the sand piles. While it is tempting to make a sample drawing for the students and tell them how to do it before conducting the experiment, the learning experience is much more meaningful if students are allowed to approach the drawings their own way and then reflect upon them.
Suggestions for Facilitating Student Reflection on Drawings: A very effective method for facilitating this type of reflection is to use a variation of the Jigsaw method. For example, if the lab groups were comprised of three students, form three large reflection groups. Each student in a lab group should be assigned to a different reflection group. Students should share and explain their drawings. Each student should think about something they learned and something they would change in their own drawings as a result of sharing. The students can then be brought back together for a whole class discussion.
Nature's Sand Blaster Reading (pages 35-36 in Student Guide):
- Students should not be held responsible for knowing the two bolded words within the reading (eolian and ventifact).
- The last bullet on page 65 in the Teacher's Guide is extremely important.
Lesson 3
PowerPoint slides containing abbreviated lab directions are available on the electronic blueprint. The slides can be displayed on classroom TV monitors. This is provided for two reasons: (1) the lab involves water, which can ruin the students' books and (2) the book directions are lengthy for third graders to navigate independently.
Observing the Sand Piles (Page 75 in Teacher's Guide)
- Steps 9 & 11 on pages 43 & 44 instruct students to record the height of their sand piles. This provides an excellent opportunity to help students construct data tables. A classroom table to record all groups' heights, as shown below, can serve as a model.
Class Sand Piles
|
Group |
Height of Sand Piles (cm) |
||
|
Day 1 |
Day 2 |
Day 3 |
|
|
A |
|||
|
B |
|||
|
C |
|||
Sample Student Data Table:
Sand Pile
|
Date |
Height (cm) |
The Term Gravity
- Per the Teachers' Guide pp.78-79: Use gravity terminology only if introduced by students. It is sufficient that they know that loose and unsupported earth materials will move downhill until they come to rest on a surface.
- See page 335 in the Research Base in Benchmarks about students' conceptions about gravity.
![]() Supplementary Resources: New Road by Gail Gibbons is a wonderful read-aloud about cutting a road through a hill/mountain area. The Sun, the Wind, and the Rain by Lisa Westberg Peters is a light-hearted story about a child's sand mountain she built at the beach. It describes the erosion of the mountain and movement of sand grains as the tide rises. Both books are available through the library.
Supplementary Resources: New Road by Gail Gibbons is a wonderful read-aloud about cutting a road through a hill/mountain area. The Sun, the Wind, and the Rain by Lisa Westberg Peters is a light-hearted story about a child's sand mountain she built at the beach. It describes the erosion of the mountain and movement of sand grains as the tide rises. Both books are available through the library.
Lesson 4
The lesson establishes the concept that water moves down, not up. Establishing this knowledge is necessary for students to understand the movement of streams and the concept of erosion by water.
PowerPoint slides containing abbreviated lab directions for all three experiments in Lesson 4 are available on the electronic blueprint. The slides can be displayed on classroom TV monitors. This is provided because the labs involve water, which can ruin the students' books.
Modeling the Mississippi
- Step 2 on page 59 in the Student Guide instructs students to make drawings of their proposed models. This is extremely difficult because the models are three-dimensional. It is reasonable to replace this step with team discussions about various ideas for the model.
- Students might want to label their models. Since these are working models and water will be used, permanent marker is necessary.
- Students are inclined to become very focused on making the water go down the Mississippi—to the point that they build huge levees/barriers. Question students on how this is like the real thing and help them problem-solve the setup so water can run into the Mississippi all along the river, not just at the starting point.
![]() Supplementary Resource: If the Waters Could Talk by Stuart Kaller is an optional read-aloud. The book is available through the library.
Supplementary Resource: If the Waters Could Talk by Stuart Kaller is an optional read-aloud. The book is available through the library.
Lesson 5
Initially, this lesson can appear very daunting; however, it is manageable. By creating their own stream models, students have the opportunity to practice valuable problem-solving skills.
Experiment Supplies (See Before You Begin on pages 98 & 99 in Teacher's Guide):
- An extra adult in the classroom is extremely helpful when conducting the experiment. See Managing the Experiment section below for some helpful tips, especially if there's only one teacher in the classroom.
- There should be enough sand left over from Lessons 1 & 2.
- Three small buckets have been added to the kit.
- Three plastic containers, which are to be used as stream tables by the students, have been added to the kit. Small drainage holes have been drilled into the end of each of them. Since the tables have been provided, pages 112-116 in the Teacher's Guide should be disregarded.
- Three 1-gallon containers, with pre-drilled holes, have been added to the kit.
- Tables to place the stream tables on are highly recommended. Desks are not totally flat. In addition, if a spill occurs, materials in students' desk may get wet.
 A short video demonstrating the experiments is available on the electronic blueprint.
Managing the Experiments
- Testing Your Stream Model: One effective technique is to have each group set up their experiments independently. Once they are ready to use the water, have all groups gather together to observe each group run water through their stream models. By having only one group work at a time with the running water, the teacher can monitor much more effectively. Students also have the opportunity to see how different setups work. Some groups may wish to incorporate what they learn from other groups and make changes to their setups prior to running the Forming a Stream experiment.
- Forming a Stream: Again, have all groups gather together to observe each group run water through their streams. They greatly benefit from observing the experiment multiple times and discussing the similarities and differences.
Changes to Lab Directions:
- Use only three cups of sand in each stream table. Make sure sand is built up slightly against the sides of the stream table.
- For each "test" use only enough water to observe the formation of a stream. The lab directions state to use the entire jug of water—that amount of water is not necessary to illustrate the concept.
- Do Events 1, 2, and 5. The others are optional.
- Flood!: This experiment is optional. If a teacher wishes to conduct the experiment, it can be completed in groups or is suitable for a teacher demonstration.
Lesson 6
A short video demonstrating use of the stream table and creation of a siphon are available on the electronic blueprint.
Determining Stream Load (Step 4 on page 125 in Teacher's Guide):
- The instructions state measure the amount of time it takes to clear the trough of sand. If after 5 minutes the trough is not clear, stop the experiment and record the time as 5+.
- Below are some sample pictures of the experiments.
The picture shows the sand spread out prior to the start of an experiment. Also notice that the tube holding water is taped to the water bucket (yellow arrow). The tubing is also secured with tape along the inside wall of the bucket. Teachers have found that setting up the siphon system and taping the tubing down prior to the lesson makes the experiment much more manageable and successful. The tubing has even been left taped for several days between parts of the lesson.

Notice that the portion of the tube outside the bucket is longer than the part inside the bucket. In order for a siphon to work, the outside section must always remain lower than the end in the bucket. Taping the tubing helps to make sure both ends are in the correct positions throughout the investigations.

The picture shows the sand after the investigation is run without placing the stream table on an angle or slope. Some sand moved down the channel and was deposited at the bottom of the stream table.

The picture to the left shows the position of the sand after the stream table is elevated/placed on an angle. All the sand moved down the channel and was deposited at the bottom of the stream table.
![]() Supplemental Resource: Niagara Falls Live, an internet web site, contains spectacular images and an interactive map. It is very useful to use in conjunction with the Niagara Falls activity in Lesson 6. The interactive map allows students to grasp the immense size of the falls. The site contains numerous photos. To access the map, click the "interactive aerial map" picture. When using the interactive map, use the arrow keys to navigate. If you scroll to the right, you will be able to display the American Falls and Horseshoe Falls, which are contained on the students' map (BLM 6-1 in the Teacher's Guide). Below is the web address to Niagara Falls Live.
Supplemental Resource: Niagara Falls Live, an internet web site, contains spectacular images and an interactive map. It is very useful to use in conjunction with the Niagara Falls activity in Lesson 6. The interactive map allows students to grasp the immense size of the falls. The site contains numerous photos. To access the map, click the "interactive aerial map" picture. When using the interactive map, use the arrow keys to navigate. If you scroll to the right, you will be able to display the American Falls and Horseshoe Falls, which are contained on the students' map (BLM 6-1 in the Teacher's Guide). Below is the web address to Niagara Falls Live.
http://www.niagarafallslive.com/map_of_the_niagara_falls_region.htm
![]() Supplementary Resources: Follow the Water from Brook to Ocean by Arthur Dorros is a wonderful book to use as a summary of the lesson. It discusses stream/river speed and the shape of a river. It may also help students understand that streams and rivers are part of larger water systems. The Wonder of a Waterfall by Allan Fowler discusses waterfalls and specifically references Niagara Falls. The books are available through the library.
Supplementary Resources: Follow the Water from Brook to Ocean by Arthur Dorros is a wonderful book to use as a summary of the lesson. It discusses stream/river speed and the shape of a river. It may also help students understand that streams and rivers are part of larger water systems. The Wonder of a Waterfall by Allan Fowler discusses waterfalls and specifically references Niagara Falls. The books are available through the library.
Lessons 7 & 8: Skip
Lesson 9
- Lesson 9 serves as a summative assessment.
- Since Lesson 7 & 8 were skipped in the module, some of the examples are not pertinent. For example, on page 131 in the Student Guide, there is a picture of a volcano. Students did not study this type of change. For the Before and After Project, make sure students are selecting situations that allow them to demonstrate and apply their knowledge from the unit. The following are some sample topics:
- Flooding
- Road building
- Weathering
- Stream erosion
![]() Supplementary Resource: The library has flagged several books as good options for end-of-unit read-alouds. Students' projects may also raise students' interests in various topics that could be further addressed through children's books.
Supplementary Resource: The library has flagged several books as good options for end-of-unit read-alouds. Students' projects may also raise students' interests in various topics that could be further addressed through children's books.